Jewelry-making is the process of crafting various forms of jewelry from raw materials. The term encompasses all of the techniques used to transform these materials into finished products, including handcrafting, machine processing, and surface treatment processes for precious metal jewelry. The manufacturing processes for jewelry can be divided into two main categories: precious metal jewelry processing and gemstone inlaying processes. Precious metal processing can be further divided into traditional handcrafting, machine processing, and surface treatment processes. Common types of jewelry-making techniques include chiseling, filigree, and the use of the lost-wax casting process. Other processes include electroplating, stamping, and pressing. The stones used in jewelry-making are also set using various techniques, such as bezel setting, prong setting, and tension setting. Different cultures have developed their unique styles of jewelry-making, utilizing various techniques and materials.
As a beginner in jewelry making, it’s important to learn basic techniques to create beautiful and unique pieces. In this article, we will explore various jewelry making techniques that will help you get started on your jewelry making journey.
Metalworking Techniques
Metalworking is a versatile and popular technique used in creating unique and personalized jewelry pieces. It involves manipulating metal to create intricate and detailed designs that can be worn as rings, bracelets, necklaces, and other types of jewelry. The art of metalworking has been around for centuries, with different cultures and civilizations developing their own unique methods and styles. Today, metalworking remains a popular and thriving craft, with artists and jewelry makers using a range of different metals and techniques to create beautiful and eye-catching jewelry pieces.
Types of metals used in metalworking
A wide range of metals can be used in metalworking, each with its own unique properties and characteristics. Some of the most popular types of metals used in metalworking include:
Gold
Gold is a popular choice for jewelry making due to its beauty and durability. It can be used in its pure form or alloyed with other metals to create different colors and levels of hardness.
Silver
Silver is another popular metal used in jewelry making. It is less expensive than gold and has a bright and lustrous appearance. Like gold, it can also be alloyed with other metals to create different properties and colors.
Copper
Copper is a soft and malleable metal that can be used to create unique and intricate designs. It has a reddish-brown color and is often used as an accent metal in jewelry making.
Brass
Brass is an alloy of copper and zinc that has a bright and golden appearance. It is a popular metal for creating vintage-style jewelry pieces.
Stainless steel
Stainless steel is a durable and corrosion-resistant metal that can be used to create contemporary and industrial-style jewelry pieces.
Titanium
Titanium is a lightweight and strong metal that is often used in modern and avant-garde jewelry designs.
There are many other types of metals that can be used in metalworking, each with their own unique properties and advantages. The choice of metal will depend on the desired look, durability, and cost of the final jewelry piece.
Materials Needed for Metalworking
To begin metalworking, you will need a range of materials and tools to help you create your jewelry pieces. Some of the most important materials and tools needed for metalworking include:
Metal sheet or wire
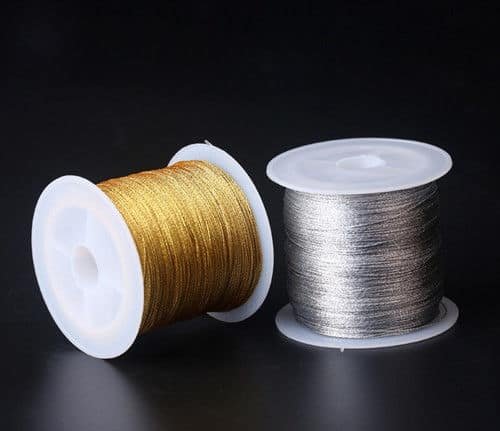
This is the primary material used in metalworking, and it can come in a range of different metals, sizes, and gauges. The metal sheet or wire will be cut, shaped, and formed into the desired design for the jewelry piece.
Solder
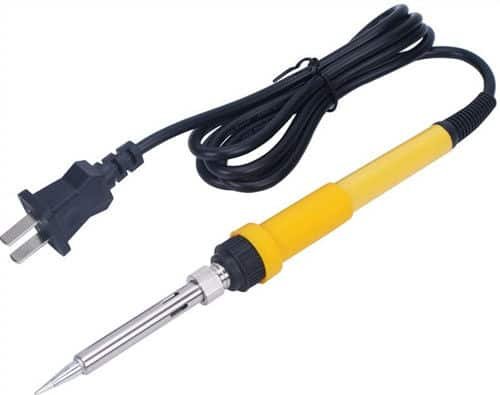
Solder is a metal alloy that is used to join two or more pieces of metal together. It is melted at high temperatures to create a strong bond between the metal pieces.
Flux
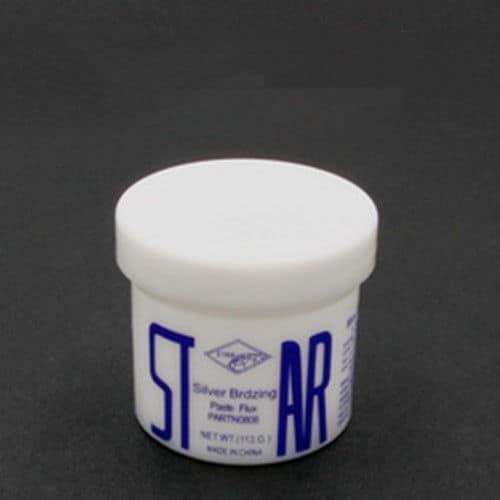
Flux is a chemical compound that is used to clean and prepare the metal surfaces before soldering. It helps to remove any oxidation or impurities that could affect the soldering process.
Torch
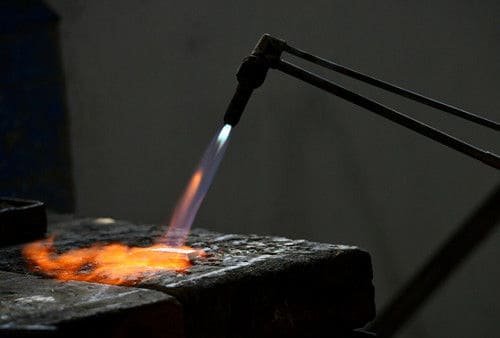
A torch is used to heat the metal and melt the solder. It can be a butane or propane torch or a larger oxy-acetylene torch for larger projects.
Saw

A jeweler’s saw is used to cut the metal sheet or wire into the desired shape.
Files

Files are used to smooth and shape the edges of the metal pieces.
Pliers
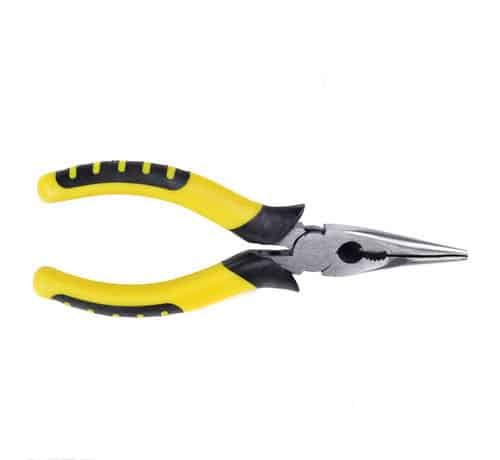
Pliers are used to bend and shape the metal into the desired design.
Hammer and anvil
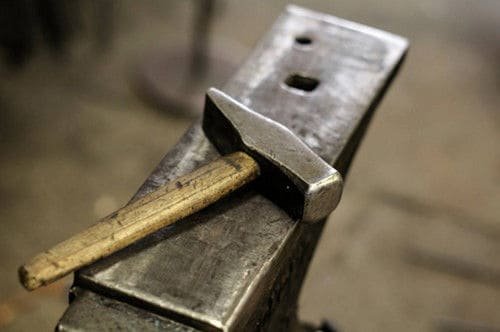
A hammer and anvil are used to shape and form the metal into three-dimensional designs.
Polishing tools
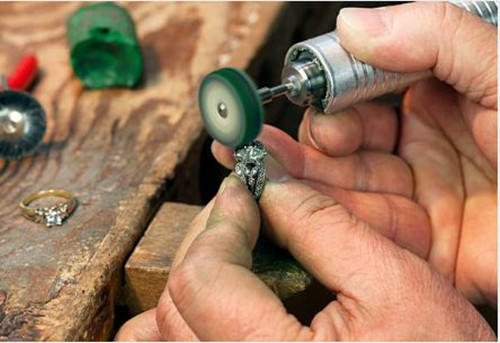
Polishing tools are used to buff and shine the metal to a high gloss finish.
These are just some of the basic materials and tools needed for metalworking. As you progress in your metalworking skills, you may need additional materials and tools for more advanced techniques and designs.
Shaping the Metal
Shaping the metal is a crucial step in metalworking. There are many techniques for shaping the metal, and the method used will depend on the desired design of the jewelry piece. Here are some of the most common shaping techniques used in metalworking:
Cutting
Metal sheets or wire can be cut using a jeweler’s saw or metal snips to create the desired shape and size.
Hammering
A hammer and anvil are used to shape the metal into three-dimensional designs. The metal can be hammered to create textures and designs, or it can be shaped into curves and angles.
Forming
Metal can be formed by using a mandrel or dapping block to create curves and shapes. The metal is placed on the mandrel or dapping block and hammered into shape.
Folding
Metal can be folded to create sharp angles and clean lines. The metal is scored with a sharp tool, and then folded along the scored line.
Piercing
Piercing is a technique used to create holes in the metal. A jeweler’s saw is used to create intricate designs and shapes by cutting out small pieces of the metal.
Embossing
Embossing is a technique used to create raised designs on the metal. A metal stamp or punch is used to create the design, and then the metal is hammered from the back to create the raised design.
These shaping techniques can be combined to create complex designs and shapes in the metal. The key to successful metal shaping is to take your time, work slowly and deliberately, and use the appropriate tools and techniques for the desired design.
Soldering the Metal
Once the metal has been shaped to the desired design, the next step in metalworking is to solder the pieces together. Soldering is the process of joining two or more pieces of metal using heat and a special metal alloy called solder.
Here are the basic steps for soldering metal:
Clean the metal
Before soldering, it is important to clean the metal pieces thoroughly. Any dirt, grease, or other contaminants can prevent the solder from adhering properly. Use a wire brush or sandpaper to remove any surface impurities.
Apply flux
Flux is a chemical compound that helps the solder flow smoothly and evenly over the metal surface. Apply a small amount of flux to the areas where the metal will be joined.
Heat the metal
Use a torch or other heat source to apply heat to the metal. The metal should be heated until it is just hot enough to melt the solder.
Apply the solder
Once the metal is heated, apply the solder to the joint. The solder will melt and flow over the metal surface, filling any gaps and bonding the pieces together.
Clean the joint
After the solder has cooled, use a wire brush or sandpaper to clean any excess flux or solder from the joint.
Soldering can be a challenging technique to master, as it requires precise control of both heat and solder. It is important to practice on scrap metal before attempting to solder a finished jewelry piece.
It is also important to choose the right type of solder for the metal being joined. Different types of metal require different types of solder, and using the wrong type of solder can result in a weak or brittle joint.
With practice and patience, soldering can be a highly effective technique for joining metal pieces in jewelry making.
Finishing the Metal Jewelry
After shaping and soldering the metal jewelry, the final step in metalworking is to finish the piece. Finishing can involve a range of techniques to polish, texture, and add color to the metal.
Here are some common techniques used to finish metal jewelry:
Polishing
Polishing is the process of smoothing the metal surface to create a shiny, reflective finish. This can be done using a polishing wheel or by hand using polishing compounds.
Texturing
Texturing is the process of creating patterns or designs on the metal surface. This can be done using hammers, stamps, or other tools to create a variety of textures and designs.
Patina
Patina is a chemical process that adds color to the metal surface. This can be done using a variety of chemicals and techniques to create a range of colors and finishes.
Engraving
Engraving is the process of cutting designs or text into the metal surface. This can be done using a variety of tools, including hand-held engraving tools and mechanical engraving machines.
Stone setting
Stone setting is the process of setting gemstones or other materials into the metal surface. This can be done using a variety of techniques, including prong setting, bezel setting, and channel setting.
Plating
Plating is the process of adding a thin layer of metal to the surface of the jewelry piece. This can be done using a variety of metals, including gold, silver, and copper, to create a range of finishes and colors.
Finishing can be a time-consuming process, but it is an important step in creating high-quality, professional-looking metal jewelry pieces. By using a range of finishing techniques, metalworkers can create unique and beautiful pieces that are sure to be treasured by their owners for years to come.
Beading Techniques
Beading is the process of creating jewelry and other decorative items using beads, which are small decorative objects typically made of glass, stone, metal, or plastic. Beading can be a fun and creative hobby that allows for endless possibilities in terms of design and style. From simple bracelets and necklaces to intricate beaded sculptures and accessories, the possibilities are endless.
One of the great things about beading is that it can be done with minimal tools and materials. All you really need are beads, string or wire, and some basic tools like pliers and scissors. This makes it an accessible hobby for anyone who wants to try their hand at creating beautiful jewelry and other beaded items.
There are many different types of beads to choose from, each with its own unique properties and characteristics. Some common types of beads include seed beads, which are tiny, uniform beads that come in a variety of colors and finishes; glass beads, which can be made in a range of colors and shapes; and gemstone beads, which are made from natural stones and come in a variety of colors and patterns.
In addition to beads, there are also a variety of stringing materials to choose from, including nylon, silk, wire, and elastic cord. Each of these materials has its own unique properties and is suited to different types of beading projects.
Whether you are a beginner or an experienced beader, there is always something new to learn and explore in the world of beading. With its endless possibilities for creativity and self-expression, beading is a wonderful way to relax, unwind, and create beautiful, one-of-a-kind pieces of jewelry and decorative items.
Types of beads
There are many different types of beads available for use in beading projects, each with its own unique properties and characteristics. Some of the most common types of beads include:
Seed Beads
These are tiny, uniform beads that come in a range of colors and finishes. They are often used for intricate beadwork and weaving projects.
Glass Beads
These come in a variety of colors and shapes, and can be used in a wide range of beading projects.
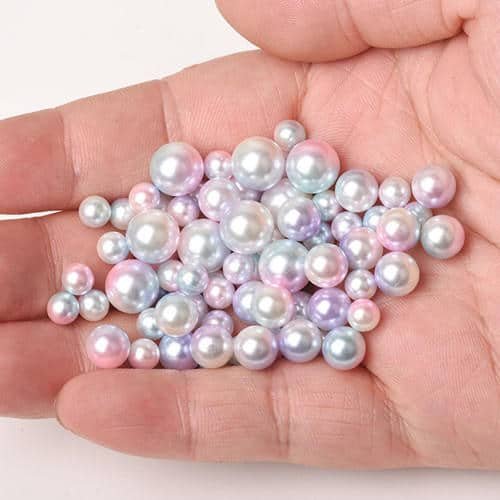
Gemstone Beads
These are made from natural stones and come in a range of colors and patterns. They can add a touch of natural beauty and elegance to any beading project.
Crystal Beads
These are made from leaded glass and have a high level of sparkle and shine. They are often used for more formal or elegant jewelry designs.
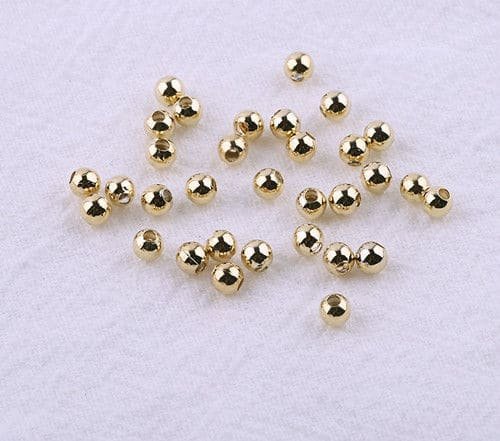
Metal Beads
These come in a variety of finishes, including silver, gold, and copper, and can add a touch of sophistication and elegance to any beading project.
Ceramic Beads
These are made from fired clay and come in a range of colors and finishes. They can add a touch of texture and earthiness to any beading project.
Wood Beads
These are made from natural wood and come in a range of colors and finishes. They can add a touch of warmth and rustic charm to any beading project.
Acrylic Beads
These are made from plastic and come in a wide range of colors, shapes, and sizes. They are often used in more casual or playful beading projects.
There are many other types of beads available as well, each with its own unique properties and characteristics. By experimenting with different types of beads, you can create truly unique and beautiful beading projects that reflect your personal style and creativity.
Materials Needed for Beading
In order to start beading, there are several basic materials and tools that you will need. These include:
Beads
Depending on the type of project you plan to make, you may need different types, sizes, and colors of beads. Refer to your project instructions or design your own bead combinations.
Thread or string

This is what you will use to string your beads together. There are different types of threads available, including nylon, silk, and cotton, each with its own properties and strengths.
Beading needles
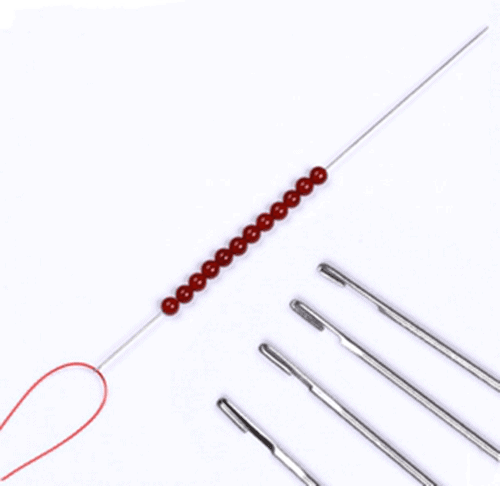
These are thinner and more flexible than regular sewing needles, making them easier to work with when stringing beads.
Scissors

You will need a pair of scissors to cut your thread and trim any excess.
Pliers
These are useful for opening and closing jump rings, attaching clasps, and manipulating wire.
Crimp beads
These are small metal beads that are used to secure the ends of your thread or string.
Clasps
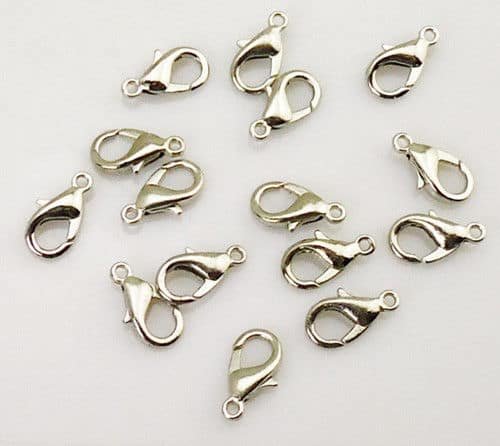
These are the fasteners that keep your jewelry securely in place. There are many different types of clasps available, including lobster clasps, toggle clasps, and magnetic clasps.
Beading mat

This is a soft surface that provides a non-slip base for your beading work. It can help keep your beads from rolling away and make it easier to see your work.
Beading tray
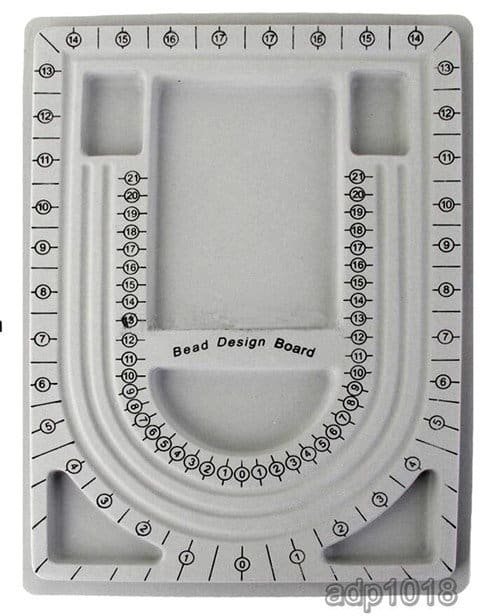
This is a shallow container with compartments that you can use to keep your beads organized and separated by color, size, or type.
By having these basic materials and tools on hand, you will be well-prepared to start creating beautiful and unique beaded jewelry. As you become more experienced and tackle more complex projects, you may find that you need additional materials or tools to help you achieve your vision.
Getting Started with Beading
Getting started with beading is a fun and rewarding hobby that can result in beautiful jewelry pieces. Whether you’re a beginner or have some experience with beading, there are a few steps you can take to get started:
Choose a project
Decide what type of jewelry piece you want to make. This could be a simple bracelet or necklace, or a more complex piece like a beaded pendant or earrings.
Gather your materials
Once you’ve chosen your project, gather all the necessary materials, including beads, thread or string, beading needles, scissors, pliers, crimp beads, and clasps. You may also want to use a beading mat and tray to keep your materials organized.
Plan your design
Sketch out your design or plan it out in your head. Decide on the color scheme and pattern you want to use.
String your beads
Thread your beads onto your string or thread, following your design or pattern.
Secure your beads
Once you’ve strung all of your beads, use crimp beads to secure the ends of your thread or string. Attach your chosen clasp to complete your jewelry piece.
Practice
If you’re new to beading, it’s a good idea to practice with some basic designs before moving on to more complex pieces. This will help you develop your skills and get comfortable with the techniques involved.
Experiment
Don’t be afraid to experiment with different bead types, colors, and patterns to create unique and personalized jewelry pieces.
By following these steps, you can start your beading journey and create beautiful jewelry pieces that you can wear or give as gifts to your loved ones. Beading can be a relaxing and enjoyable hobby that allows you to express your creativity and create something truly one-of-a-kind.
Advanced Beading Techniques
Once you’ve mastered the basics of beading, you may want to explore more advanced techniques that can take your jewelry-making skills to the next level. Here are a few advanced beading techniques to consider:
Bead weaving
This technique involves weaving beads together using a needle and thread to create intricate patterns and designs. There are many different types of bead weaving, including peyote stitch, right angle weave, and herringbone stitch.
Bead embroidery
Bead embroidery involves sewing beads onto fabric to create textured and dimensional designs. This technique can be used to embellish clothing, accessories, and even home decor items.
Wire wrapping
Wire wrapping involves wrapping wire around beads to create unique and intricate designs. This technique can be used to create pendants, earrings, and other jewelry pieces.
Kumihimo
Kumihimo is a Japanese braiding technique that involves braiding strands of beads or cords together using a special loom. This technique can be used to create beautiful bracelets and necklaces.
Bead crochet
Bead crochet involves using a crochet hook to thread beads onto a strand of yarn or thread, creating a flexible and sturdy piece of jewelry.
By exploring these advanced beading techniques, you can take your jewelry-making skills to the next level and create even more intricate and unique designs. Remember to practice and experiment with different techniques and materials to find what works best for you.
Finishing the Beaded Jewelry
Once you’ve finished creating your beaded jewelry, it’s important to properly finish and secure it to ensure it lasts a long time. Here are some tips for finishing your beaded jewelry:
Knotting
If you’ve strung your beads on a string or cord, be sure to knot the ends to prevent the beads from sliding off. You can use a knotting tool or simply tie a knot and add a dab of glue to secure it.
Crimping
If you’ve used beading wire, you can finish the ends by crimping a small metal bead onto each end. This creates a secure loop for attaching a clasp.
Adding a clasp
Most beaded jewelry will need a clasp to be wearable. You can choose from a variety of clasps, including lobster clasps, toggle clasps, and magnetic clasps. Simply attach the clasp to each end of your beaded strand using jump rings.
Adding crimp covers
If you’ve used crimps to finish your beading wire, you can cover them up with small metal beads called crimp covers. These give your jewelry a more finished look and prevent the crimps from snagging on clothing.
Adding a charm or pendant
You can add a charm or pendant to your beaded jewelry by attaching it with a jump ring or wire wrap. This adds a personal touch to your design and can make it even more special.
By properly finishing your beaded jewelry, you can ensure that it’s secure and ready to wear. Be sure to take your time and use quality materials to create a piece of jewelry that will last for years to come.
Polymer Clay
Polymer clay is a versatile material that can be molded and shaped to create a variety of jewelry designs. There are several basic polymer clay techniques that every beginner should learn.
Molding and Shaping
To mold and shape polymer clay, you will need polymer clay and a set of clay tools.
Choose your desired color of polymer clay.
Mold the clay into your desired shape using your hands or clay tools.
Once you have created your desired shape, bake the polymer clay in an oven according to the manufacturer’s instructions.
Texturing
To add texture to polymer clay, you will need polymer clay and a texture stamp or tool.
Choose your desired color of polymer clay.
Roll the polymer clay into a sheet using a rolling pin or pasta machine.
Place the texture stamp or tool onto the clay and press firmly to create the desired texture.
Once you have added the texture, cut out the polymer clay into your desired shape.
Bake the polymer clay in an oven according to the manufacturer’s instructions.
Caning
Caning is a technique used to create intricate designs and patterns in polymer clay.
Choose your desired colors of polymer clay.
Roll out each color of clay into a long, thin log.
Stack the logs together in your desired pattern.
Press the logs together to create a cane.
Slice the cane into thin, even slices to create your desired design.
Bake the polymer clay in an oven according to the manufacturer’s instructions.
Other Techniques
Resin Casting
Resin casting is a technique used to create molds for jewelry. It involves pouring a liquid resin into a mold and allowing it to harden. Once hardened, the resin can be removed from the mold and used to create a piece of jewelry.
Enameling
Enameling is a technique used to add color to metal. It involves applying powdered glass enamel to the metal and firing it in a kiln.
Metal Clay
Metal clay is a material made of metal particles and binder that can be molded and shaped like clay. Once fired, it turns into solid metal, allowing for intricate designs and shapes.
Chainmaille
Chainmaille is a technique used to create jewelry by linking together metal rings. This technique can be used to create intricate designs and patterns.
Jewelry making techniques offer endless possibilities for creating unique and stunning accessories. From beading to metalworking to resin, there are techniques suitable for all skill levels and personal styles. Whether you are a beginner or an experienced jewelry maker, the key to success is practice and experimentation. Don’t be afraid to try new techniques and incorporate different materials into your designs. With a little creativity and dedication, you can create beautiful and one-of-a-kind jewelry pieces that you will be proud to wear or sell.